Monday, March 30, 2015

Finally...Miniature Koi Pond-THE BIG REVEAL!!!

I have ALWAYS wanted to do that!

It's not that I HAVE a really big reveal...heck...you already saw the majority of the Koi pond already, but when I can squeeze TWO blog posts out of  ONE manic effort, you best BELIEVE I'm taking advantage of THAT "crazy', my friends.

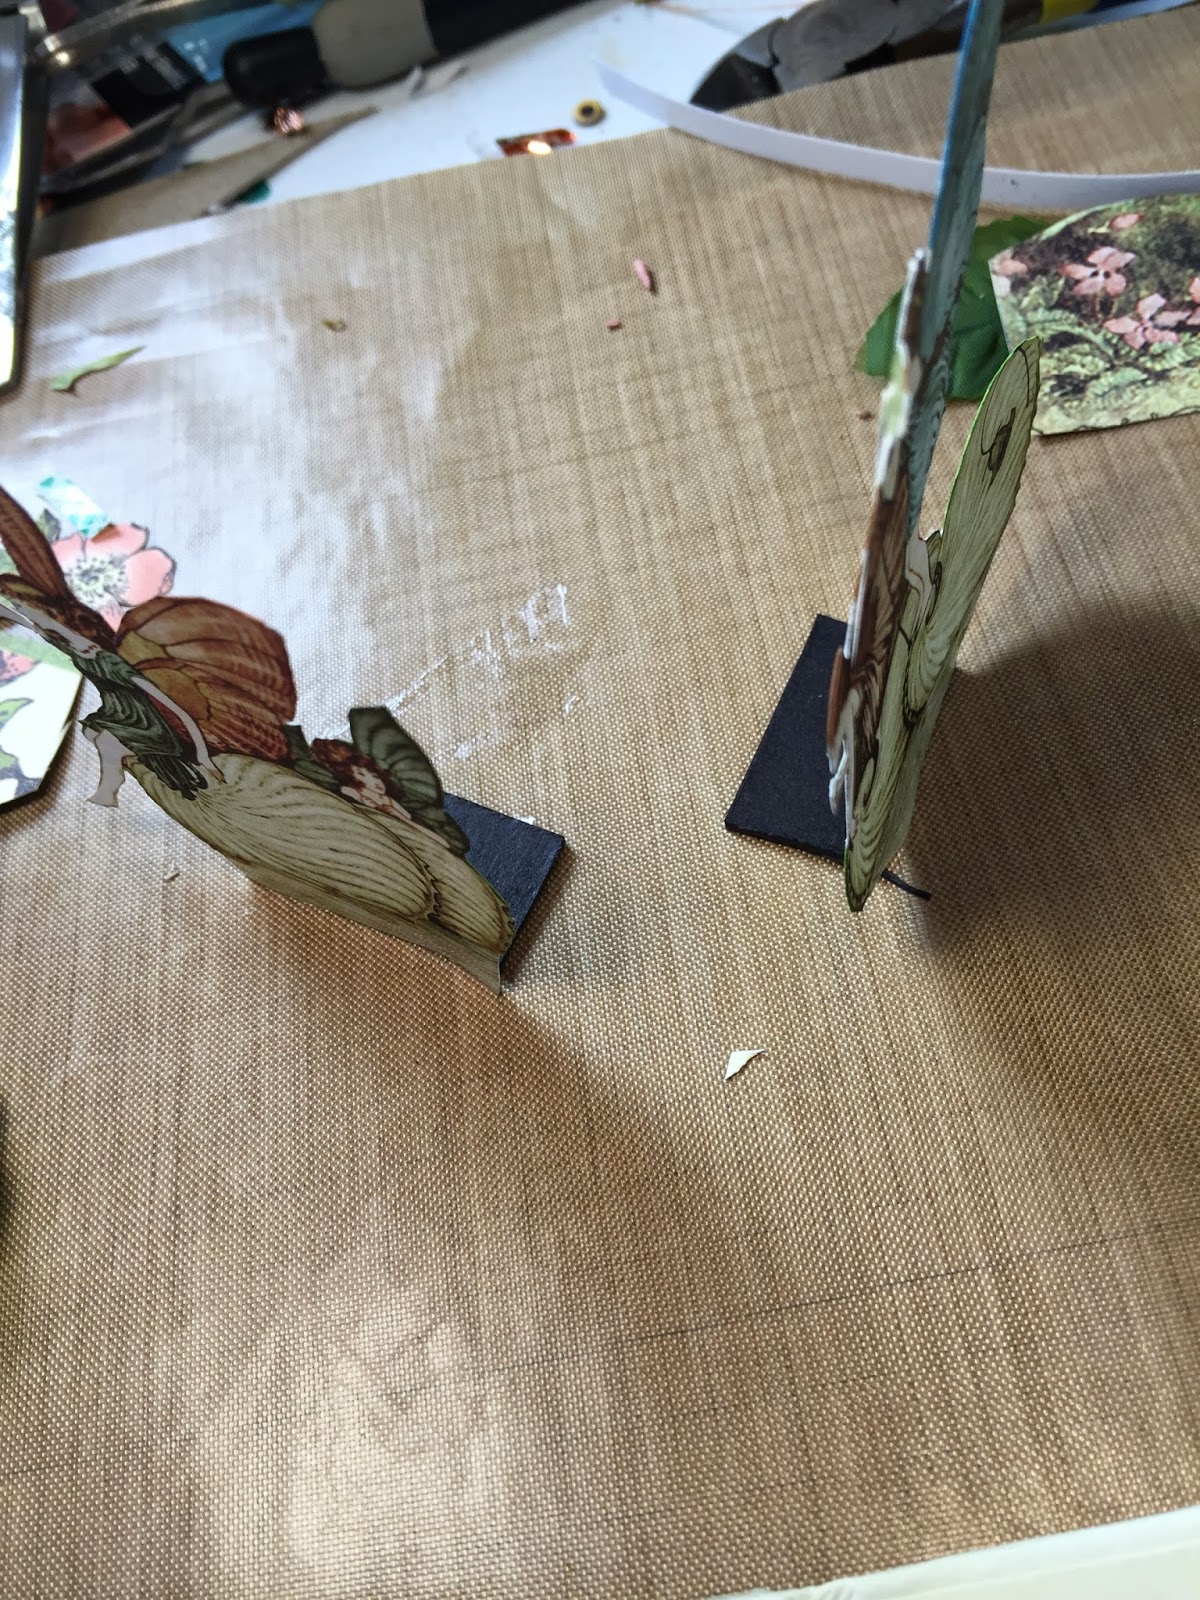
Without further ado, here it is:

The actual measurements are something like 1-3/4 x 3/4. I'm not sure if this is truly 1:12 scale, which I'm told is the scale normally used by miniaturists, but to go any smaller would necessitate my losing weight in my fingers, and since I can't do it anywhere else on my body, I doubt I'm going to be successful there. 

Once again, I've got to point you to the girl that provided the tutorial on youtube...she's amazing, and her tutorial is one of the best I've found. I'm not crazy about hearing someone talk on video tutorials. Mostly because I'm one of these fickle people who, if I wake up on the wrong side of the bed, might hear your voice and it could trigger my Misophonia (see THIS post for further edification if you missed it the first time) and things could end up badly for both of us. 

I've made ONE video tutorial and won't do another where I talk. In the sense of fairness, my OWN voice can drive me to mayhem, so don't take it personally.

But THIS artist plays calming music and does a beautiful job of filming what she's doing. No small feat (no pun intended...trust) when you consider how small everything really is.

To get the finish on the fish, her advice was to mix a pearl and translucent clay together. It also makes the fins almost transparent as well. I really love the effect. 

I have two more artistic endeavors I'm working on and hope to have them done midweek. As a teaser, one of them is another miniature, but much more difficult than this. It involves actual paper engineering. The second is an art assemblage copy of an Art Nouveau piece that, if it keeps going the way it is, might just be the most incredible thing I've ever done. Not that my bar is set too high, mind you, but for ME...well...it's fabulous, if I say so myself. ;)

Not to mention my Graphic 45 Secret Garden shadowbox, which now has the 3 completed elements I needed to make it the way I wanted. Bobby, my beloved blog friend, asked if I would be making the flowers. Here's my official answer. 

**Ahem**

Those who know me are well-aware that I have made some pretty decent flowers in the past. But at some point, I believe that outsourcing a few things is a consideration that arises and must be acted upon. Therefore, I will be using flowers from a darling girl in Thailand, who makes the most amazing mulberry flowers...miniatures, mind you...along with the tiniest buds. As this task is boring to me, and due to the exchange rate where 50 bucks translates into 6 months of gorgeous roses, dahlias and buds-even I didn't use them all up in  that time frame!-I have to ask myself a hard question...

Am I going to sweat it out over flowers, after having a blast with these cooler miniature pieces, thus turning this project into drudgery, which will put me in a nasty mood for several days, and cause my children-who, like facing a vampire-will scramble to find, not a Rosary, but a Butterfinger and the number to grandma's to keep me at bay???? 

The answer is NO. Not just No, but HADES NO!

Besides, lovely girl in Thailand, whose name I'm not sure how to pronounce, and I are both happy with this arrangement. If you want to visit her, here's her link.

So, I'm out...off to finish up what I can. And for those of you who have been simply flabbergasted by 3 posts from me in 3 days, I don't want you to worry...I PROMISE to lapse back into my 'underachiever' mode fairly soon. I tell you this because you KNOW how I feel about raising anyone's expectations...that just causes me to work harder. And that never works out for ANY of us. ;)

Sunday, March 29, 2015

'WATER' you up to? I hope THIS project URNS your attention!

I hate puns. 
I really do.
Whenever I have the misfortune to run into one of those 'punny' people, I find they have the exact same effect on me, as those (namely, my children) who chew with their mouths open, making smacky, slurpy sounds...
Want to know exactly what is that effect? 
As soon as one of my children begins masticating loudly, setting off a chain reaction in which the others will follow suit, I lose all realization that those are the little angels I birthed, and I want to give them up for adoption. 

No...I'm just kidding. I don't want to put them up for adoption! 

I want to beat them within an inch of their lives. 

It's not my fault. You see, a few years ago, there was a study that concluded that there are actually people who went temporarily insane when faced with chompy, slurpy, teeth sucking, noisy while swallowing barbarians...literally...these people temporarily lost their minds and tried to hurt people!! They even came up with a name for it:

Misophonia.

Seriously!!! Click here for the definition and all the other fun stuff.  

But to prove my point, here's part of the entry.

"People who have misophonia are most commonly angered by specific sounds, such as slurping, throat-clearing, nail-clipping, chewing, drinking, tooth-brushing, breathing, sniffing, talking, sneezing, yawning, walking, gum-chewing or popping, laughing, snoring, typing, coughing, humming, whistling, singing, certain consonants, or repetitive sounds.[12] Sufferers experience fight/flight symptoms such as sweating, muscle tension, and quickened heartbeat."

Not to mention that it tends to have a correlation with OCD, and we ALL know who's constantly embroiled in some battle with hers on a daily basis, don't we? 

(crickets chirping......no, wait, that drives me crazy too.) 

Um...that would be ME.

Now, I'm fully aware that many of you are somewhat skeptical regarding disorders such as Misophonia, and I totally understand. See, we live in a society that wants to 'diagnose' everything. If you're blue, you're 'chronically depressed'. Loud and energetic? 'Manic' or 'ADHD'. Painfully shy? 'Social Anxiety Disorder'. Overbearing, Spendthrift and a hypocrite? 'Politician'. 

We can argue all day about whether or not we've become a society that has become so plastic, shallow and narcissistic that we can't just have general feelings and/or personality traits...we have to NAME them, so that we can play the victim. We could debate whether a lot of today's psychology is bunk and furthered by Big Pharm in order to drive profits through psych meds. Or, we can discuss why we've become so afraid of feeling ANYTHING, that we panic and try to medicate ourselves out of our 'self' and back into 'surface only'. 

But, all that potential future debate aside, I WILL say that we REALLY should treat this Misophonia thing as legit...because, if we don't, well...sigh...I COULD be looking at a long-term, fully supervised living arrangement. 

And it's NOT at the local retirement facility. 

;)

Now...onto my dabblings for today: 

If you'll remember, we're building a 'Secret Garden' shadowbox, using a Graphic 45 Staples box and including lots of fun, handmade miniatures to fill it!

Okay, okay...I know...'what's this WE stuff', you're asking. Fine. I'M building this Secret Garden, and this is another element to join my Koi pond (Full reveal tomorrow, folks!) and my garden urn made of quilled paper. 

But today is the garden sink, made by Prima, and gussied up by yours truly!

Let's start with the sink.
Now, this is WAY to purty to be in ANY garden. So, let's age it up a bit. Using Mushroom alcohol ink and a felt pad that I hold in my hand (no girly applicator for me....I live WIDE-OPEN here, people!!  Okay...so it's because you can't get into all the corners as well. Whatever.)
Keep dabbin'...a little more...

And I believe we've got a winner, here!
Btw, that bottle up there is alcohol. Cheaper than blending solution and just as effective. I'm a very messy person and I need LOTS of cleaning solution in whatever medium I'm....oh, well...whatever medium I happen to be making a mess in THAT day, and alcohol works for me.
Whatever you do, don't stress about any white part inside the sink....our 'water' will cover it up!

Next, let's grab our moss. Fresh from Hobby Lobby.
Then, using Glossy Accents, or ANY invisible when dry glue, let's start shredding that moss and add some believability to our garden sink, shall we?
Look...I PROMISE you that there is NO WAY to mess this up. Seriously. Because I would've totally messed this sucker up a thousand times by now. Trust. So use as much moss as you like and stick it anywhere you want! 
On the sink, of course. 
heh heh

NEXT: Take your glossy accents or any clear drying glue and fill the sink. Also make a line from the spigot (which was installed several pics ago with E6000, It comes separate in the package and all you have to do is glue it in.)
Next, I used microbeads-blue and clear-both found at Michaels, and covered the line to mimic running water. Using my little sharp, pointy thingy, I kept the errant beads from trying to make a break for it, for the few seconds it took for the glue to set enough to hold its shape.


I drizzled some over the sides and let that sucker dry overnight! Give it a try, 

Here's what we have for the Secret Garden so far. Tomorrow, the unveiling of the Koi Pond! Yeah...I know...you're about to burst from excitement. 


Saturday, March 28, 2015

A Garden Urn for YOU...Wait...Not THAT kind of Urn for YOU...

...It wasn't a threat!!  I swear!!  I meant the good kind! For flowers and such and...
Sigh.
I'm pretty sure this is what all those school teachers were talking about during one of (the MANY) school conferences with my parents. I was either talking too much OR saying inappropriate things OR not thinking before I spoke and having 'unintentional, yet profound, impact on others'. 

I'm just kidding!! 

Seriously...It's wasn't either/or...it was all three. Together. At the same time.

Oh, come on...did you REALLY expect anything different??? This is ME we're dealing with here, people!

I'm working on a shadowbox secret garden. Using Graphic 45 staples and paper, I wanted to put something together that was unique and filled (mostly) with things I made myself. Hence, the Koi Pond and now, the urn planter and garden sink. 

The garden sink is made by prima, but I gussied it up so I can feel pretty good about having a hand in customizing that. In fact, I'll have the tutorial for you tomorrow, if you're so inclined to take a look. :)

Today, however, is the day for my garden urn planter. 

I've never 'quilled' in my life. Personally, the first time I heard it, I thought it had something to do with old writing quills. 

Or a QUILTER with a lisp.

Anyway, I figured out that it's not that hard, and I jumped into making the base, which I shaped and stuck a toothpick into for stability. That was easy enough. It was the next part that threw me. See, I'd discovered these wonderful little urns HERE 

WARNING: Don't panic. It's neither you, nor your wine consumption, that causes the page to look funny. It's in French. Wine consumption, at this point, would only be a negative if you started seeing the text in English. THEN there would be cause for concern, or flat-out panic...at least a LITTLE before you pass out.

Being a visual learner, I wasn't too concerned with my French being limited to "Commet alley vous, Mademoiselle." and "Sprecken zie English". 

The problem was the little coils with the big holes in the middle. My Curling Coach was CLEARLY not set up for this. Fortunately, I knew the ONE place where I would find the right answer. And NO...it wasn't Pinterest. Remember, it was PINTEREST that got me into that mess in the first place.

 I went to talk to the Dirty Girls as Splitcoaststampers.com. The Dirty Girls are what the SCS Design Team is referred to. As there is 12 on the design team at all times, it's called the 'Dirty Dozen'.  A 'Dirty Girl' spends 6 months in the 'Dirt Pile', then comes out as a master of all papercraft. Sort of like Kung-Fu, but without all the sweating and boiling pot of water to brand ourselves with some symbol of our mastery on our forearms; like a paper trimmer or something REALLY edgy...like a Scor-Pal.

I spent 6 months on the dirt pile, myself. Personally, I think they were really short last October, and they figured I MIGHT be less high-maintenance and less 'stalker-y' if they were to put me on it. But, whatever the reason, if THOSE girls don't know the answer, then there IS no answer.  

In English, at least. 

Sure enough, someone suggested coiling paper around a tube which was close to the circumference I needed. Which I did. Twice. Shaped them both to fit evenly, and one to fit  the coil on the wrapped toothpick. 

Afterwards, I put a decorative sticker around the middle and 2 plain line stickers at the top and bottom for texture. Then, I painted it white (yes...I used different colors of paper...kept running out of the colors I was working with....then painted it a gray that I mixed with matte Mod Podge for sealing. After letting it dry for a few minutes, I lightly used a baby wipe to create some distress, and that was it! 

So, my secret garden progresses. Here's a look at a little of the process.


Friday, March 27, 2015

BASS-ACKWARD Mini Projects with Carmen

Meet my miniature Koi pond. I made him out of clay (cue song)
I fired him (actually, I baked him in the oven for 20 minutes, but using the term 'fired' sounds makes it sound SO much more like I know what I'm doing! Which I don't! Yet more evidence that YouTube is going to bring about the end of the world as we know it...ok, ok...cue THAT song, as well.)


I'd also like to introduce my miniature koi fish, lillypads and flower, also made from clay. 

Now, I will take you to the Koi in the pond, covered by their first coat of resin. 
Tomorrow, we'll introduce the 2 lily pads, AND a tiny little frog. Which I did NOT make. But DANG he looks cute on the pad!!! No...you CANNOT see it yet! Tomorrow, I said! 

Only because I'm too lazy to take another picture and have to push all those buttons to send it to my computer, then download them and you know...all that stuff it takes MINUTES to do! Too tired.

But I WILL let you have a group photo

This little Koi pond came about when I saw this video tutorial on you tube.

I'm telling you, this girl is GOOD. I mean, REALLY GOOD!!!

This was a first try for me, and probably not the last. Lately, I've had this thing for miniature making. You know, sort of like that thing I had for clocks, then Altoid tins, then purses, then 3D, then watercolor, then 3D flowers, etc. etc. etc.

On that note, I've got a miniature garden urn planter (from quilled/coiled paper) I've got to finish, and, for the mother of all non-sequiters, a miniature, Victorian lamp to attempt. All for my new shadowbox project that I wanted to have done a week ago, but we know how I am about that 'planning' thing.


THINGS YOU WILL NEED

Pebbles, coated with dark gray paint and rinsed. 
Dark Gray Ballast Medium cinders (for bottom of pond...found it at a model rr hobby store)
E6000
Sculpey Clay-Translucent, Pearl, white, yellow, green, red
The patience of Job...either real or the one that comes in the handy pill formula. 
tee hee

Thursday, March 19, 2015

Graphic 45 Design Team Audition 2015


My Art on Pinterest!

G45 Cuff Bangle-Made with G45 key, lock and doorknob plate (blog tutorial here)


G45 Couture Vanity


G45 Botanical/Couture ATC Cigar Box Armoire (5 photos)


Once Upon A Springtime Nightlight/Shadowbox ft. Chibitronic LED lights (Blog tutorial here)
(6 photos)


TY, G45!

My art on Pinterest! 


Friday, March 6, 2015

Bling, Blang, Hot DANG!

Rarely, does a first-time effort of mine actually WORK. 
May I present to you, the Graphic 45 Cuff.


As I was saying, RARELY do things work out for me on the first try. I really want to stress this because when I first started crafting 2 years ago, I was convinced that all the fabulous projects I kept seeing were first attempts by the artists! Seriously! Think about the videos and tutorials that are out there...how many of them actually admit they're on their 17th attempt? That's right...not many. However, the stars aligned correctly for me and, not only did I nail the first attempt, I'm on my way to buy lottery tickets. Or, 'fund my retirement', as I'm fond of calling it. 

I figure the chances of the lottery paying off for me is about as likely as Social Security. But ya gotta look at the glass as half full of wine and not half empty. Of course, ANY wine in a glass is a positive thing. Now, I'm thinking about wine and have forgotten what I'm supposed to be talking about. Sigh.

The cuff! That's it. And I'll have you know that I have prepared one of my incredibly technical tutorials that reflect my inherent professionalism and attention to task. 

NOTE: Any wine bottles in my tutorial photos are for craft purposes only. No grapes were harmed during the making of this tutorial. I can't make the same promise for children or husbands, but at least the grapes are safe.

As most of you know, Graphic 45 is having their Design Team call, and I fully intend to give it a go. Laura Carson, a G45 Ambassador (Ambassadors are people who work with G45 in teaching classes, etc. and aren't like the rest of us, who craft only when we can feed our kids Benadryl to get a few hours of peace) created a gorgeous necklace out of G45 materials.  Being ever the fan of non-traditional craft item usage, I wanted to make my own jewelry. So, I pulled out all the G45 ephemera I had on hand.


My FIRST thought was to make a crown. Mostly because I have always believed I SHOULD have a crown and forcing everyone do what I say, when I say it. However, as large as this door plate is, it certainly wasn't large enough to fit my head. So, that left only 2 other body parts that weren't too chubby to actually consider using as inspiration for jewelry. An ankle bracelet or wrist cuff. I quickly dropped the ankle idea, feeling it might resemble a shackle, moreso than a bracelet, so the cuff it was. 

Bending the lock wasn't too difficult...at least I don't THINK it was...I made my husband do it. BUT, the hardest part was curving the ends, which we did with some needlenose pliers and patience.  When we finished, I spray painted it gold, just to see if the paint would stick and give me a good base for what I had in mind. It did. :)

Next, I started assembling what I wanted to use and piecing it together. 
 Using my needle-nose pliers, I bent the brass side pieces I found in my stash to accommodate the curve.

 Using E6000, I glued it all together and spray painted it in Metallic gold and let it dry overnight.


What I had in mind was to try and enamel this part of the cuff before putting on the final two pieces. I'd been wanting to try Ice Resin enamels, so I purchased the Turquoise finish (I had this idea of worn verdigris with pops of gold) and found the process quite easy. You won't get the smooth enamel finish that you get when using enamel and fire (which I believe my husband, and the State of NC has banned me from using) but it was easy and I like the finish. First, you brush on the liquid Medium and sprinkle the Iced Enamels. Mine was 'Relique Turquoise'. After heating it with your heat gun, you can continue to add layers. Just watch the hot metal. I didn't  and the only positive thing is that the kids will think I had myself branded, which will add to the 'fear factor' with which I use to raise my three boys.

I used 2 coats of enamel, brushing powder away from different parts I wanted to accent.

I coated the piece with liquid resin and let it dry overnight. The next morning, I glued crystals to the main butterfly piece, then glued it-along with the key on its back-to the butterfly below. I wanted more gold to show through, so I began lightly scraping the soft enamel off. The resin wasn't dry, so I was able to take a lot of the enamel off without scratching the gold spray paint off underneath. Then, I coated everything again with resin. And, once again, here is the result.
Thanks for hanging out with me and please let me know if you have any questions. I appreciate all the encouragement I'm getting for this G45 audition...I appreciate it more than y'all will EVER know! MWAAAH!


Monday, March 2, 2015

A Fae for Good Luck! I'm gonna need it! Ft. Graphic 45 "Once Upon A Springtime" and Chibitronics

First, my apologies for the amount of pics to follow...but this is a project with a lot of stuff going on and I have NO way of explaining it all without the pics...so thanks for grooving along with me!

Graphic 45 "Once Upon A Springtime" Fairy Diorama/Night Light, featuring Chibitronics made with G45's 5x5 Mixed Media Box with window.


 Front with see-through window, both sides framed using frames from the collection and acetate.


Last summer, I discovered an AWESOME product with a LOT of potential called Chibi-using copper tape, a watch battery and tiny LED light circuits, we can now bring light to our projects without having to use those dang huge fake candle lights.
Putting up these 2 rows of lights took less than 5 minutes. And it's easy...trust me. I failed every form of math and science known to man, and I can STILL do this.  Now, I can tell you're not impressed...yet. But consider this...I'm able to take this cute project and take it to another level entirely when I light it up with blue and white LED'S and make this cute diorama into a fully functional nightlight!
Here it is in full light...you can still see the blue tint. 
As to the rest, here are the close-ups and additional angles
As to the process, I mixed up some dark blue paint and painted the back of the box. I added a little tissue paper for texture, and painted it again.
After it dried, I installed the lights using E6000 on the batteries and binder clips to hold them firm.

Next, I cut my frames and trimmed an arch at the top of the window to fit.
I made the log the fairy is seated on out of Model Air-Air drying clay. I used a toothpick to scrape the lines and just rolled it. I flattened the part for her seat and let it dry. Then, I used my Copic air compressor to spray different E's and YR markers and kept layering them to get the layered color. Trust me when I say that I'm not an expert in layering color...just use browns and oranges and you can't go wrong. :) When done, I glued moss over the log and attached it to the back using E6000. Then, using plastic greenery, I began building my 'forest glade'. 


The rest was just decorating! I was SO pleased with the way this turned out! This is one of the projects I'm submitting for the G45 Design Team tryouts, so wish me luck, peeps!

More info regarding chibitronics can be found here at chibitronics.com